7 Creative Ways to Use Pom-Poms in Elementary Music Class
- sarahlmauro
- May 6, 2024
- 7 min read

For such a simple craft item, pom-poms have so many uses in the music room. These colorful and affordable little poofs should definitely be a staple in your classroom.
In this post, I’ll share 7 different music activities and lessons that use pom-poms. Your kids will love using these manipulatives to help learn and practice rhythm, interact with technology, and compose their own music!
Where I get my pom-poms
I use these from Amazon (not affiliate). There are 350 one inch pom-poms in this bag, and the color variation is really great because they go beyond the basic crayon box colors. So many color choices will come in handy for some of these activities!
Organization
For organization, I rely on plastic boxes, baggies, buckets, and paper plates. It’s really important to me that I can quickly grab things I need and easily set up activities. So I’ll also share easy ways to store and prep materials for these activities.

Okay, here we go!
1. Decoding 1- and 2-sound words
Decoding words is one of the steps I take with students as they start learning rhythm.
First we decode aurally by audiating and clapping (for example, ‘pumpkin’ has two sounds but ‘pie’ has only one). Then we get into small groups use pom-poms to show how many sounds words have.
Rhythm is a foundational skill for young musicians. It's important to make it fun and accessible so you can build on their skills as they get older.
Not sure how to begin rhythm with your littles? Download this free 12-page guide to help you hook your students, scaffold your lessons, and build those skills!

Here, my students are decoding the zodiac animals. One pom-pom underneath means it has one sound, two means it has two sounds.
Some are incorrect in the picture. But that’s actually a good thing! I can walk around and see which students understand this concept and which don’t. That is much harder to do in a group setting. But in small groups, I can quickly see who needs my help.
Prep
I put a bunch of pom-poms on paper plates. No need to count them or sort them by color.
2. Rhythm practice
Pom-poms are perfect for when I begin dot notation, a precursor to stick notation, in first grade. (Learn more about dot notation and how I teach rhythm here.)
Once we finish group instruction, we move to small groups. At each group are a bunch of pom-poms, templates with four empty circles, and a mallet to use as a pointer.

Students build their own four beat rhythms by placing either one or two pom-poms in each circle. Then they use the mallet to point to each circle as they speak the rhythm (I use ‘long’ and ‘short short’).

Alternatively, they can tap the rhythm with the mallet moving from beat to beat.
Tip: A variation on this is pairing students up and having once compose the rhythm and the other speak or clap it.
Prep
If I have time, I set up each group’s materials ahead of time. At the very least, I like for each student to have a handful pom-poms set up for them. Kids retrieving their own pom-poms might sound like less work for you, but I just know my kids would grab a handful, drop a bunch, throw some, and be too concerned about which colors they had.
Prepping plastic bags with 7-8 pom-poms ahead of time means you just need to hand each kid a bag.
This activity is also a great to pair with my Cut and Sorts!
This is the Camping Cut and Sort, one of the activities we do to practice dot notation.
I, or the students, cut out 16 themed pictures. Then, students sort them by how many syllables them have (1 = 1 dot, 2 = 2 dots).
Eventually we translate this to stick notation. In fact, all my Cut and Sorts come in 3 versions: dot notation, stick notation, and notehead notation.
Click here to purchase this Cut and Sort for your students! (Oh, and I have LOTS of versions, not just camping.)
2. Composition with Playxylo.com
This one’s perfect if you have access to tablets or computers. Using playxylo.com, students compose and play their own melodies.
In this activity, color matters.

Now this is simply a scale. But I also encourage kids to repeat colors or leave some out to see how different combinations sound.
Tip: A variation on this activity is to pair students up so they can switch being the composer or performer. This is also great if you don't have enough tablets or computers for every student.
Prep
Because color matters here, I prep paper plates with two or three of each xylophone color per student (you can change the colors on playxylo.com from default to boomwhacker colors, too).
But to make it easier for future me, I store these sets in baggies. Next time, all I have to do is dump them out onto plates or hand kids a bag and they’re good to go!
3. Composition with Songmaker
Another tech-related composition activity. Kids will create a short melody using pom-poms, then translate it into Chrome Music Lab’s Songmaker.

You’ll need to set aside certain colors for this one.
You also will probably want to modify the settings so there are fewer boxes in the grid. I like to use 2 bars with 4 beats each, not split the beat, and stay within one octave.

Tip: If some kids need an extra challenge, let them stack pom-poms to create harmonies!
Prep
Again, color matters here. Prep plates or baggies with one or two pom-poms of each color.
4. Composition with xylophones
This is one of my favorite centers for K and 1. It’s similar to the previous examples, but totally tech-free.
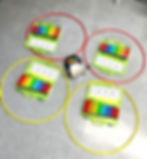
Using hula hoops as a workspace, I place a set of colored resonator bells and mallet inside each one, plus a bucket of pom-poms in the middle.
Sometimes I also place a four circles template with each station. Giving some rules, like only one or two pom-poms per circle, helps provide more structure, which can also mean more on-task behavior.

Prep
The hula hoops are optional, but I really like them to help designate workspaces for students.
You’ll need a few sets of resonator bars. I have a bunch of these (not affiliate).
You’ll also need a bunch of each color pom-pom in one bucket. Old yogurt containers work well for this! (Seriously. I save so many dairy and produce containers from home because I use them for organizing small sets of materials for my students.)

5. Choosing groups or teams
This one’s a hack for you, the teacher. To divide up your class into groups, count how many kids are present that day. Figure out how many groups you want.
Example: You have 17 kids, so three groups of 4 and one group of 5.
Then, chose as many different colors as you have groups.
In my example, there are four groups, so I need 4 colors.
However many kids you have in each group is how many of that color you’ll need.
In my example, I could do four blue, four red, four yellow, and five green.
Put all those pom-poms in a bucket (another yogurt container to the rescue!) and select one for each kid. Then, their colors are their groups.
Tip: Something fun you could do is replace one of the pom-poms in the biggest group with a special one, and whoever ends up with that one gets to choose their group.
Prep
You need to know how many kids you have and how many groups you want before gathering the pom-poms you need. That’s why I also like having a big storage container of them at the ready.

6. Boomwhacker composition
Another activity similar to 2, 3, and 4, but this time with boomwhackers.

The goal is to write a group song with each kid playing one or two boomwhackers.
In my experience, boomwhacker players tend to get silly quickly unless there’s a good structure for them to follow. I’d highly recommend using paper template, or giving kids stipulations like they can only use 8 pom-poms at a time.
For more about how to use boomwhackers in your classroom, visit this blog post!
Prep
Prepare your boomwhacker-colored pom-poms in baggies or on paper plates. And decide which boomwhackers you'll have students using. In small groups, I'd only have as many as there are students so each student is responsible for one boomwhacker. Keep it simple.
7. Form lesson
Several years ago when I taught 5th grade music, I would do a mini unit on form using old TV themes, like Yogi Bear, I Dream of Jeannie, and The Munsters.
Kids would be listening for same and different parts of the song. They would map the form using pom-poms- a new color for each new section. Their final project was to write and perform a cup routine that matched the form of one of the songs. It was a lot of fun!

Download this free cup rhythm composition center to get started with cups in your music room!
Prep
I’d diagram the form of each song ahead of time, then prep paper plates with the correct number of colors and pom-poms needed. Color didn’t matter so long as there were enough to match each section.
Example: The form of a song is ABAC
You would need 2 of one color for A, one of another color (B), and one of
another color (C).
Tip: It might also help to tell students which color is which letter. We learned that the hard way when diagramming the Munsters theme song!

If this post was helpful, share it with a friend who you think could also learn from it!
And if this kind of post is right up you alley, you might love the ADM Community Newsletter. It's a monthly email newsletter I send out with curated music ed content I collect from teachers and musicians to help you to switch things up while also inspiring kids to be lifelong musicians. Subscribe here to get on the list!
Happy music-making!
~Sarah


